Edit the POS Button Assignment for a Promotion
On the Discount Template Configuration window, you can assign a location for promotion buttons in SubwayPOS®.
-
On the Discount Templates screen, open the discount template that contains the promotion that you want to select.
-
On the Discount Template Detail screen, select the promotion you want to add to your discount template, then click View/Edit in the POS Button Assignment column.
-
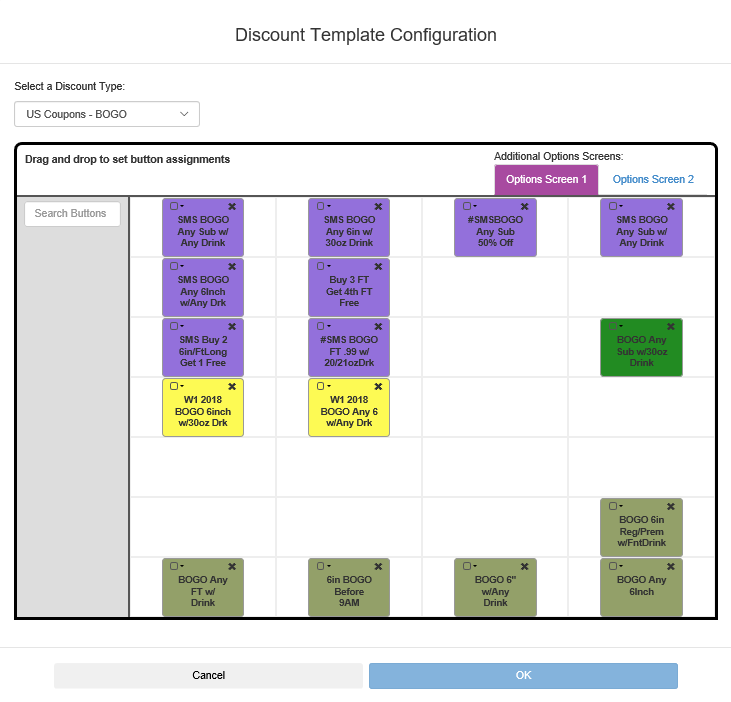
The Discount Template Configuration window expands. [Show image.][Hide image.]
It includes these areas below the Select a Discount Type list:
-
Use the tab area to select another options screen if there is one.
-
Use the button list (in gray at the left) to select promotions to be assigned to a screen.
-
Use the grid area as a prototype of the screen. You can add, move, and delete buttons for promotions, and assign the button colors.
-
-
Edit the button assignments as needed.
-
To add a button to the screen, locate it in the button list (in gray at the left), then drag it to the desired position in the grid.
-
To move a button to a different position, drag it to its new position.
-
To move a button to a different screen, you must delete it from the current screen, open the new screen, and then add the button to the new screen.
-
To delete a button from the screen, click
 on the button or drag it from the grid to the button list.
 -
It is not possible to copy a button.
-
-
To assign button colors, do the following:
-
Click the arrow next to the color icon on the button. [Show image.][Hide image.]
-
 When the color selector window opens, click the button color that you want to use.
 -
Click anywhere to close the color selector window.
-
-
Click OK.

